
A VPN (Virtual Private Network) for smart TVs encrypts your TV’s internet connection, keeping your streaming private and secure. If you want to know how to set up a VPN on your smart TV, read along to find easy step-by-step guides for different devices.
VPN on smart TV: most common issues
|
Issue
|
Solution
|
|
VPN app not available
|
• Use the router setup or hotspot method for incompatible TVs
• Check if your TV’s operating system supports VPN apps |
|
Slow streaming speeds
|
• Connect to servers closer to your location
• Try different VPN protocols (WireGuard recommended) |
|
Connection drops
|
• Enable auto-connect in your VPN app settings
• Check your internet connection stability • Contact Surfshark support for persistent issues |
Why use a VPN on your smart TV?
Installing a VPN app on your TV can have significant perks for both your viewing experience and online privacy. Here’s why you should consider it:
- Enhanced privacy and security:
- Encrypts your streaming data from ISPs, advertisers, and hackers;
- Keeps your viewing habits private.
- Improved streaming performance:
- Prevents ISP bandwidth throttling during heavy streaming;
- Maintains consistent connection speeds.
- Safe public Wi-Fi usage:
- Protects your data when using city-wide or hotel Wi-Fi networks;
- Prevents cybercriminals from intercepting your information.
- Access to home content when abroad:
- Connect to servers in your home country when abroad;
- Access your favorite news apps and services.
In essence, a VPN not only enhances your options while traveling but also ensures your online activities remain private and secure. With a good VPN such as Surfshark, you get a reliable, easy-to-use, and highly effective service.
Disclaimer: Please note that using Surfshark services for any illegal activities is strictly forbidden and violates our Terms of Service. Make sure that any use of Surfshark services for your particular activities conforms to all relevant laws and regulations, including those of any service providers and websites you access using Surfshark.

Enjoy secure streaming
Limit ISP slowdowns and safeguard your privacy with Surfshark VPN
Get SurfsharkHow to install a VPN on a smart TV: 4 simple methods
There are four different methods to use a VPN on your smart TV, including downloading a VPN app directly to your TV, configuring a VPN on your router, creating a VPN-protected Wi-Fi hotspot, and setting up an Ethernet cable connection.
Let’s take a closer look at each of them:
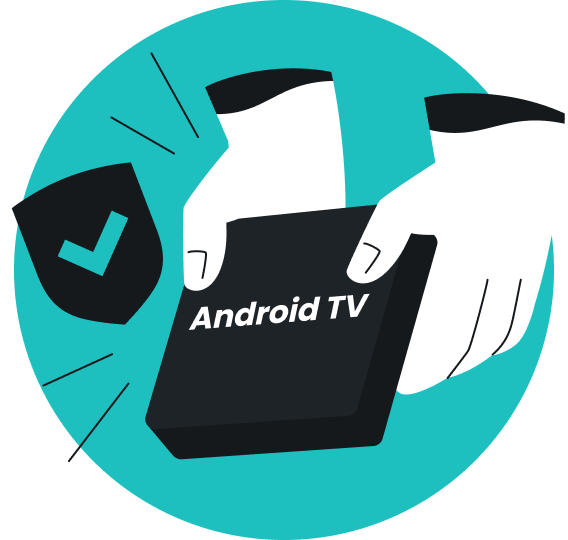
Method 1: Direct app install
Best for: quick and easy VPN setup on an Android TV or Apple TV (tvOS 17 and later).
VPN setup on Android TV:
- Open the Google Play Store on your Android TV.
- Search for Surfshark VPN.
- Click Install to download the app.
- Open the app and log in to your Surfshark account.
- (Optional) Save your credentials in a password manager for future use.
- Select a server location and connect.
You can also find broader instructions on how to set up and use Surfshark on Android TV in our support guide.
VPN setup on Apple TV HD and Apple TV 4K:
- Go to the App Store on your Apple TV.
- Search for Surfshark VPN.
- Download the app.
- Open the app and log in to your Surfshark account.
- Select a server location and connect.
You can also read our support guide for more comprehensive instructions on how to set up and use Surfshark on Apple TV.
Method 2: Router setup
Best for: protecting all devices on a network.
VPN setup on a router:
- Check if your VPN provider supports your router model.
- Open a browser and enter your router’s IP address (usually 192.168.0.1 or 192.168.1.1).
- Log in with your router’s username and password.
- Configure the router’s VPN settings. If you’re using Surfshark, follow a guide for your router model:
- Connect the TV to your home network — it will now fully benefit from a VPN on your router.
Method 3: VPN-protected Wi-Fi hotspot (Windows only)
Why Windows only: macOS doesn’t natively support sharing a VPN-protected connection over Wi-Fi. Older sharing methods like using L2TP/IPSec are no longer supported by most VPNs due to security concerns.
Best for: TVs that don’t support VPN apps.
Setting up a VPN-protected hotspot:
- Enable the OpenVPN protocol:
- Install Surfshark VPN app on your computer, launch it, and go to Settings > VPN settings;
- Select Protocol > OpenVPN (UDP);
- Make sure you’re disconnected from Surfshark.
- Navigate to DCO (Data Channel Offload) adapter settings:
- In the Search bar, type Network connections and select View network connections;
- You’ll see all network adapters installed on your device, including DCO for Surfshark. Keep this window open.
- Turn on mobile hotspot:
- Press Windows Key + S, type Mobile hotspot settings, and press Enter;
- Switch on Mobile hotspot;
- Below, you’ll see Network name (it will appear on other devices when searching for new Wi-Fi connections) and Network password (you’ll need it to connect to this network). You can change them by clicking the Edit button.
- Configure the VPN adapter:
- Go back to the Network connections; you’ll find the new network adapter there, which will be used for sharing the internet connection from your Windows PC;
- Right-click the Data Channel Offload for Surfshark adapter and select Properties;
- Open the Sharing tab and check Allow other network users to connect…;
- From the dropdown, select the mobile hotspot you just created and click OK.
- Connect to the VPN:
- Open the Surfshark app and connect to your chosen location;
- Using another device, connect to the VPN-protected Wi-Fi hotspot you just created and enter the Network password (from step 3).
For more comprehensive instructions with screenshots, refer to our support article on how to set up a VPN-protected Wi-Fi hotspot using Windows.
Method 4: Ethernet cable connection (Windows)
Best for: TVs that don’t support VPN apps and/or Wi-Fi.
Setting up Ethernet cable connection:
- Enable the OpenVPN protocol:
- Install Surfshark VPN app on your computer, launch it, and go to Settings > VPN settings;
- Select Protocol > OpenVPN (UDP);
- Make sure you’re disconnected from Surfshark.
- Navigate to DCO (Data Channel Offload) adapter settings:
- In the Search bar, type Network connections and select View network connections;
- You’ll see all network adapters installed on your device, including DCO for Surfshark. Keep this window open.
- Configure the VPN adapter:
- Right-click the Data Channel Offload for Surfshark adapter and select Properties;
- Open the Sharing tab and check Allow other network users to connect…;
- From the dropdown menu, select Ethernet and click OK.
- Connect to the VPN:
- Open the Surfshark app and connect to your chosen location.
- Share the VPN connection:
- Connect your TV, gaming console, or another device to the computer using an Ethernet cable.
You can find more comprehensive instructions in our support article on how to share VPN connection through Windows using an Ethernet cable.
Setting up a VPN on streaming devices
Not all TVs support VPN apps directly, especially older, non-smart models. The good news is that you can still use a VPN on an Amazon Fire TV Stick or a Chromecast, which require only an HDMI connection to work with your TV.
VPN on Chromecast
Setting up a VPN on Chromecast:
- Open the Google Play Store on your Chromecast.
- Search for and install the Surfshark VPN app.
- Log in to your account.
- In the app, select Quick connect.
- Your Chromecast traffic is now encrypted and secure.
VPN on Amazon Fire TV Stick
Setting up a VPN on Amazon Fire TV Stick:
- Open the Amazon Appstore on your Fire TV Stick.
- Search for and install the Surfshark VPN app.
- Log in to your account.
- In the app, select Quick connect.
- Your Amazon TV Stick is now VPN-protected.
VPN on Roku
Setting up a VPN on Roku:
- Roku doesn’t support VPN apps directly. Follow Method 2 or 3 above to create a VPN-protected network.
- Connect your Roku device to the network.
- Your Roku traffic is now encrypted and secure.
VPN on Nvidia Shield
Setting up a VPN on Nvidia Shield:
- Open the Google Play Store on your Nvidia Shield.
- Search for and install the Surfshark VPN app.
- Log in to your account.
- In the app, select Quick connect.
- Your Shield device is now VPN-protected.
Conclusion: enjoy seamless streaming with a VPN on your TV
Now that you know how to set up a VPN on both smart and non-smart TVs, you’re all set for a safer, more flexible streaming experience. Time to sit back, relax, and enjoy your favorite shows with the added protection of a VPN.

FAQ
Can all smart TVs run a VPN?
No, not all smart TVs support VPN apps directly. Android TVs and Apple TVs (with the newest versions of tvOS) can install VPN apps, while Samsung (Tizen OS), LG (webOS), and other smart TVs require alternative methods like router setup or VPN-protected hotspots.
How do I use a VPN on my Samsung TV?
Since Samsung TVs come with Tizen OS, an operating system that doesn’t directly support VPN apps, you’ll need to set up a VPN on your router or use a VPN-protected Wi-Fi hotspot. This way, all the devices connected to your network, including your Samsung TV, will benefit from the VPN’s protection.
Which smart TVs have VPN apps?
Amazon Fire TV (including the newest Vega OS), Google TV, Android TV, and newer Apple TVs (running tvOS 17 or later) support VPN apps. Smart TVs, such as those from Roku, Samsung, Vizio, and LG, also offer VPN options.
Should I use a free VPN on my smart TV?
Using a free VPN on your smart TV isn’t recommended because free services often have speed, bandwidth, and security limitations. A paid VPN service is usually better for the best protection and performance.
Can I use a VPN to stream content?
Yes, you can use a VPN to stream content securely by encrypting your connection, which helps protect your privacy. Additionally, if you’re traveling abroad, a VPN can help you access your favorite news apps and services as if you were still in your home country.
Does using a VPN affect streaming quality?
When using a VPN, a slight reduction in speed can occur due to encryption. Selecting high-quality VPN services, servers closer to your location, or protocols like WireGuard can minimize the impact.
How do I verify that the VPN on my TV is working?
To check if your TV traffic is protected by the VPN service, try using IP lookup websites directly on your TV’s browser or check within the VPN app interface.
Will using a VPN slow down my smart TV’s internet connection?
A VPN can cause a slight drop in speed because your traffic is encrypted and routed through a remote server. However, with a fast, well-optimized VPN like Surfshark, you most likely won’t notice an impact. In some cases, a VPN can even improve streaming stability by avoiding ISP bandwidth throttling.
What’s the best VPN protocol for smart TV streaming?
For most smart TVs, WireGuard is the best protocol for fast, reliable streaming. It offers a great balance of speed, security, and stability. If WireGuard isn’t available on your device, OpenVPN is a good alternative for smooth streaming performance.
Can I use one VPN subscription on multiple smart TVs?
Yes, with Surfshark’s unlimited simultaneous connections, you can use a single VPN subscription on as many smart TVs (and all your other devices) as you have at home. Alternatively, you can install Surfshark VPN on your router, extending VPN protection to every TV and gadget on your home network automatically.