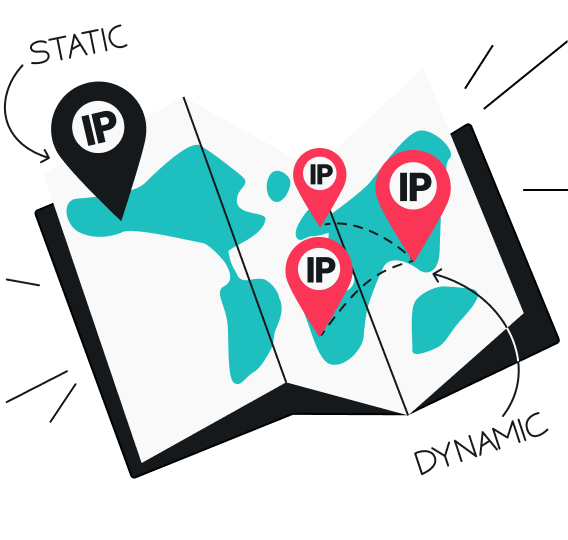
Dynamic IP (Internet Protocol) addresses change from time to time. Typically, this isn’t an issue for the casual internet user. But for some more specialized use cases like IP configuration errors, it’s better to have a static IP address that always stays the same. So, read below — this article is all about using a static IP.
Table of contents
Why you may need a static IP address
Usually, your device gains a dynamic IP via DHCP (Dynamic Host Configuration Protocol), which you’ll switch away from when setting a static IP address. But before you go out of your way to obtain a static IP, you may want to know why you’re doing all this.
Here are a few good reasons to get a static IP:
You want to host a server | If you want a server that potentially anyone (or just you when you’re away from home) can reach, you need a static IP. Without it, your visitors could run into walls like the vexing “Server IP address could not be found” error. This applies to game servers, email servers, and setting up your own VPN server. |
|---|---|
You want more speed | Both file downloads and uploads are faster with a static IP. |
You want a better VoIP experience | VoIP (Voice over IP) is the technology behind all our live voice chats online. While they don’t always turn out to be top quality, having a static IP may increase it. |
You want accurate geotracking | If you want your device to show up more precisely on various geolocation tools, a static IP could help. |
Pros and cons of a static IP address
A static IP address offers multiple benefits that make it ideal for businesses and advanced users. However, it’s not without its drawbacks, which makes the choice less obvious for casual users.
Aspect | Pros | Cons |
|---|---|---|
IP address | Provides the same IP every time; useful for businesses and remote access | Reduced anonymity compared to dynamic IPs, as all activity is tied to one IP |
Remote access | Ideal for remote workers and businesses needing secure, consistent access | If compromised, the IP remains the same, making it an easier target for hackers |
Website & service access | Reduced the number of CAPTCHA verifications and helps avoid VPN blocks on some services | Some websites track activity based on static IPs, reducing privacy |
Online banking security | Banks are less likely to flag logins from a consistent IP | If your static IP is leaked, it can be used to track you |
Hosting & server access | Required for running servers, remote desktop access, or hosting a website securely | May require extra configuration and security measures to avoid attacks |
Connection speeds | Can be more reliable than shared dynamic VPN servers | Often costs extra, as static IP VPNs are premium features |
Firewall compatibility | Works with most firewalls, better than shared VPN IPs | If your employer or government detects VPN usage, they may still block it or attempt to monitor your internet traffic |
Smart device security | Allows secure remote access to home security systems and smart devices | Requires manual setup, and any security misconfiguration can expose your devices |
How to set a static IP address
Before following any of the guides, contact your ISP (Internet Service Provider), as it assigns static IP addresses. Depending on your ISP, you may have to pay extra for a static IP address.
Your IP address might be in the IPv4 (Internet Protocol version 4) format, which looks like X.X.X.X, where X can be any value between 0 and 255. For example, your IP address may be something like 192.0.2.146.
With that out of the way, follow the appropriate guide to set up your static IP:
How to set a static IP address on Windows 11
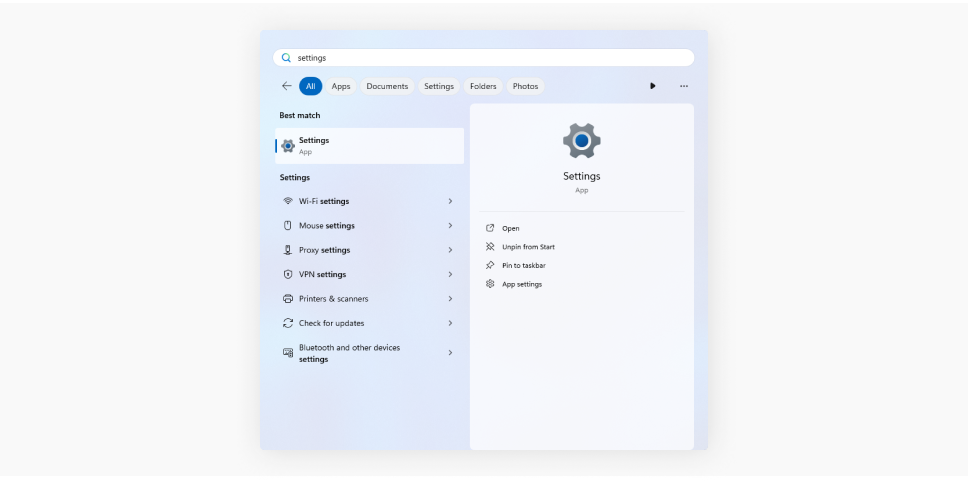
- Enter Settings into the search bar and click Enter.
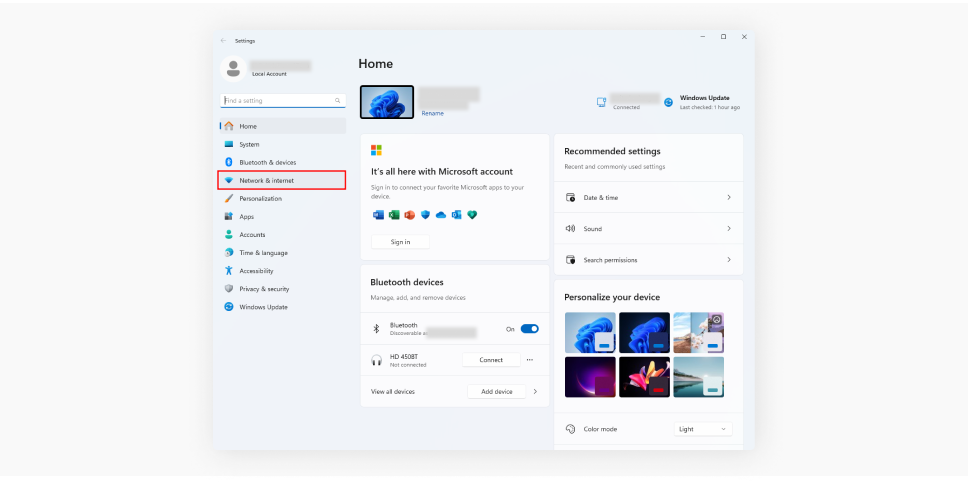
- Choose Network & internet.
- Click Advanced network settings.
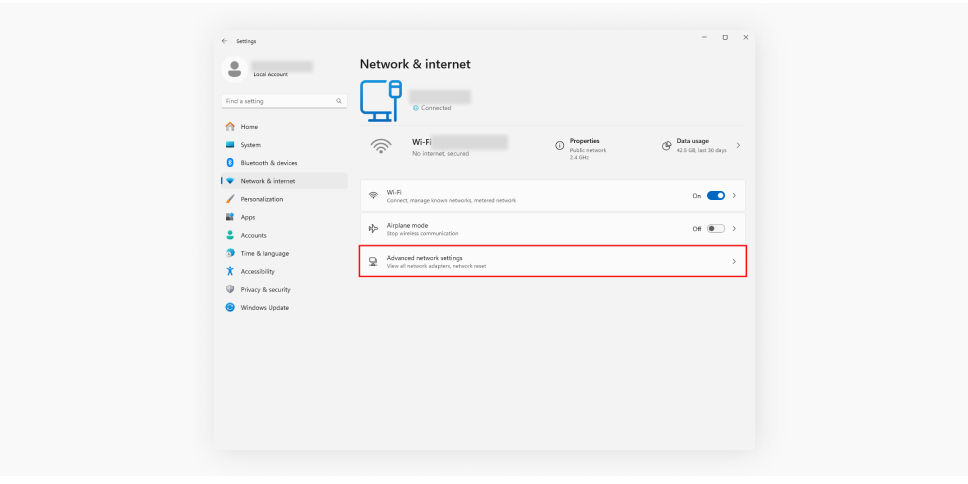
- Scroll down to Hardware and connection properties and click it.
- Write down the current IPv4, Subnet mask, Default Gateway, and DNS server addresses for future use.
- Back on Network & internet, click on either the Ethernet or Wi-Fi connection for your internet connection.
- If you’re using Wi-Fi, you’ll need to click <name of connection> properties.
- Click on the Edit button for the IP assignment settings.
- Select the Manual option from the drop-down menu.
- Turn on the IPv4 toggle switch.
- Enter your new IP address in the IP address window.
- Enter the rest of the data according to what you noted down earlier.
- Click Save.
How to set a static IP address on Windows 10
- Open Settings.
- Click Network & internet.
- Select Wi-Fi or Ethernet, depending on what you’re using.
- Select your network connection.
- Click the Edit button under IP settings.
- Select Manual on the drop-down menu.
- Toggle on the IPv4 switch.
- Fill in your new IP address. You can use your old Preferred DNS, Default Gateway, etc.
- Click Save.
How to set up a static IP address on macOS
- Open the Apple menu.
- Choose System Settings.
- Find and click Network.
- Click on the network connection you use.
- Click Details.
- Choose TCP/IP.
- Click the Configure IPv4 pop-up menu and choose Manually.
- Enter the new static IP address in the IP field and any other data you need.
How to set up a static IP address on Android
There are countless Android versions out there, so the instructions may differ based on your manufacturer and other factors.
- Open Settings.
- Go to Wi-Fi.
- Click the “i” button next to your Wi-Fi connection.
- Tap on IP settings.
- Choose Static.
- Input the new IP address and hit Save.
How to set up a static IP address on iOS
- Open Settings and tap Wi-Fi.
- Choose Network.
- Under IPv4, tap Configure IP.
- Choose Manual.
- Input your new static IP address.
How to set a static IP address on Linux
- With the Ctrl+Alt+T command, open the terminal.
- Run the ip addr or ifconfig command and identify your network interface.
- Open the Netplan Configuration file using the command ls /etc/netplan/.
- Edit the YAML configuration file from the previous step using a text editor like Nano or Vim.
- Under the relevant network interface, modify the file to list your static IP settings.
- Save the file and run sudo netplan apply to apply the modifications.
How to set a static IP address on Raspberry Pi
- On the menu bar, click on the Wi-Fi icon.
- Select the Wireless & Wired Network Settings.
- Select a network interface — wlan0 for Wi-Fi and eth0 for ethernet.
- Enter your static IP address in the IPv4 Address field.
- Enter your router’s IP address in the Router field and the DNS server’s IP address in the DNS Servers field.
- Click Apply and reboot your Pi.
How to set a static IP address through a router
You can set a static IP address through your router for all devices connected to its network. For this, you will need the MAC address of the device you want to set up with a static IP. This device will also have to be connected to the router.
Note that these instructions are general, and the process might slightly differ depending on your router.
- Access your router by typing its IP address (usually found on the back of your router) into the search bar of your web browser.
- Log in to your router’s admin panel.
- On the configuration page, navigate to LAN settings, Network Settings, Advanced Settings, or something similar.
- Look for DHCP reservations or static IP addresses settings.
- Enter the MAC address of the device you want to set up with a static IP.
- Enter the static IP address you want to assign to the device.
- Save the changes. You may also need to restart your router or the device.
Don’t want to do any of that? There’s always the option of getting a Dedicated IP from Surfshark. This way, you’ll have a VPN server with a static IP — just connect to it when you go online and enjoy the benefits.
The difference between static and dynamic IP addresses
There are some differences between static and dynamic IP addresses. Here are the essential differences worth noting:
Static IP address | Dynamic IP address |
|---|---|
Never changes | Changes frequently, for example, after rebooting a device |
Has to be requested from an ISP | Can be changed at any time |
Costs money for the user and ISP | Cheap to maintain |
And these are basically all the essential differences between static and dynamic IPs worth knowing!
Learn more about how to change your IP address in this guide.
In conclusion: Surfshark is the easiest way to get a static IP
Most people don’t really need a static IP address, as a dynamic one perfectly serves their needs. However, if you need to get a static address, the process isn’t that involved aside from getting it from the ISP. And, of course, the fastest way to do this is to use a static IP server via the Surfshark VPN app.
FAQ
How do I get a static IP address for free?
Unless your ISP is giving out free IP addresses, you can’t. On the other hand, if you’re an existing Surfshark VPN user, you can switch to the static IP section on the app and join a static IP server. If you always join the same server, you’ll always have the same IP.
Is it okay to use a static IP address?
It’s okay to use a static IP address. A static IP is a little less secure than a dynamic address. Its static nature can make your device easier to access if it also has an open port number, but not by much.
How do I use a static IP address on my Wi-Fi?
If your home Wi-Fi network is run from a router provided by your ISP, you should ask the ISP to give you a static IP and then configure your router to use it. The exact details depend on the router in question.
What’s the difference between a dedicated and static IP?
A static IP is an IP address that doesn’t change over time. On the Surfshark VPN app, Static IP is a feature that allows users to connect to a VPN server that will always have the same IP address. However, that IP address is shared by all the users connected to the server. Dedicated IP is a different Surfshark tool. It gives you a static IP that will never change and will always be yours — and only yours — as long as you’re subscribed to the service.


