

So you’ve reached the point in your life where you want to use a proxy for your internet browsing needs? Then step right up, folks. I’m here to help you figure out how to change your Google Chrome proxy settings on your computer.
Table of contents
What is a proxy server?
A proxy server acts as an intermediary between you and the internet. Instead of connecting straight to the internet, you connect to a proxy that changes your IP address (Internet Protocol), which is responsible for connecting you to the website you want.
If you’ve ever used Uber Eats, think of your proxy as the driver who communicates with the restaurant instead of you.
Many businesses or schools also provide proxies to allow you access to their databases or the needed tools to complete your work.
Does Chrome have its own proxy settings?
Short answer – no. Google Chrome will follow your device’s proxy server settings and provide an easy way to access those settings from the browser itself.
How to check proxy settings on Chrome
Before setting up your current proxy, you may want to check whether you have any pre-existing proxies.
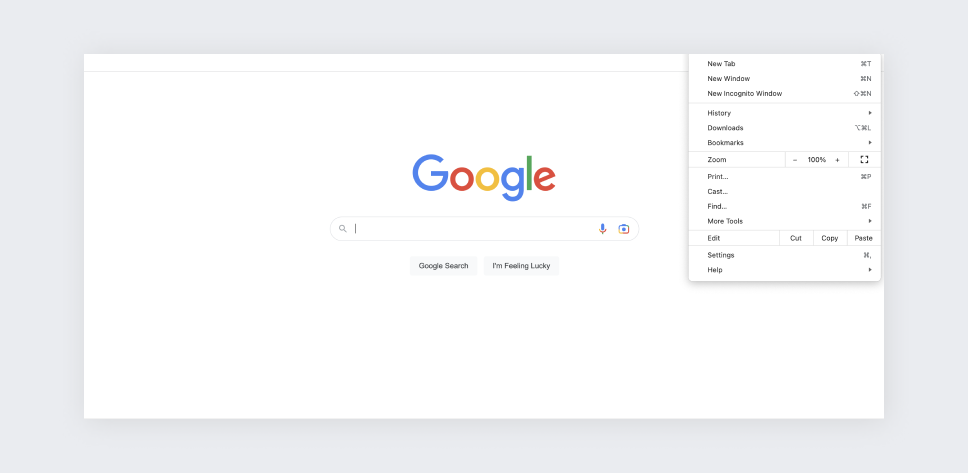
Step 1: Open Chrome.
Step 2: In the top right corner, click the Menu button, which looks like three dots.
Step 3: Go to Settings. Enter “proxy” in the Search field.
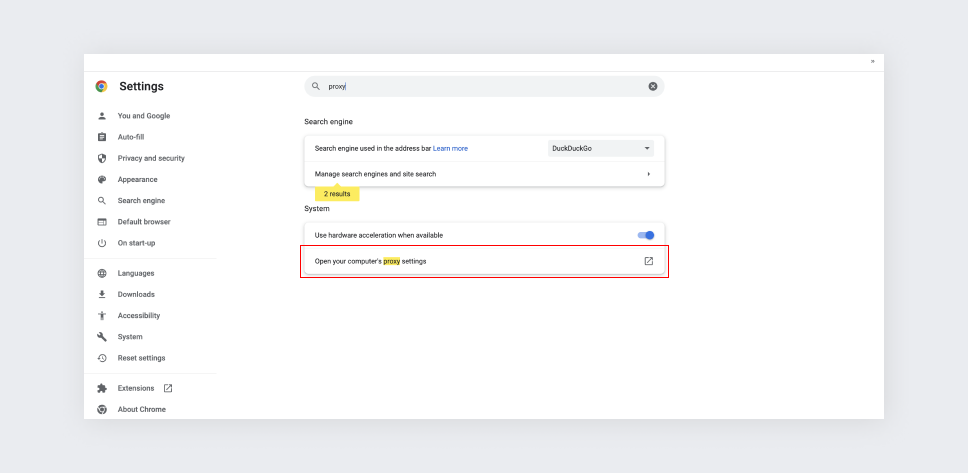
Step 4: Click on Open your computer’s proxy settings.
How to change proxy settings in Chrome
Now let’s get to the point. Here are the first steps for changing proxy settings in Chrome – they’re the same for all operating systems. Do these and then read along, depending on your OS.
Step 1: Open your Chrome browser, and click on the menu button. Then select Settings.
Step 2: In the Search settings field, enter “proxy.”
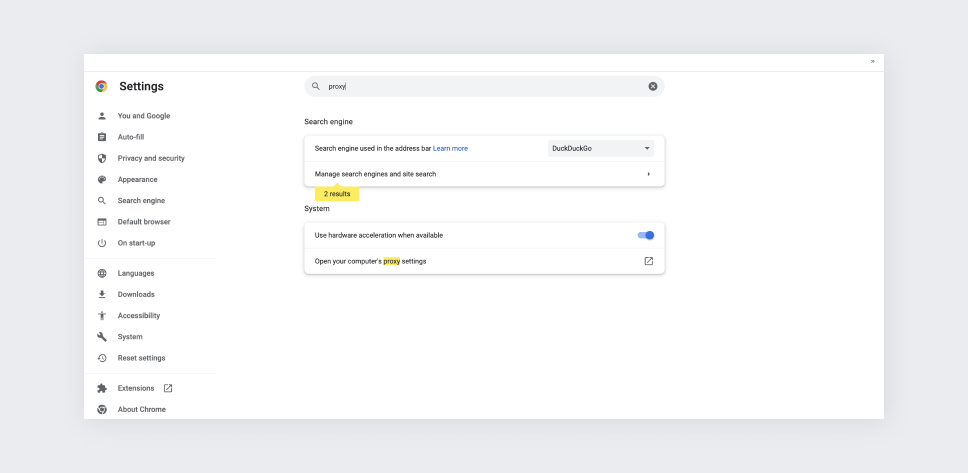
Step 3: Click on the Open your computer’s proxy settings button. This will bring you to a pop-up box for your system proxy settings.
The next steps for your proxy server settings will depend on your operating system.
Windows
Method 1: Automatic setup
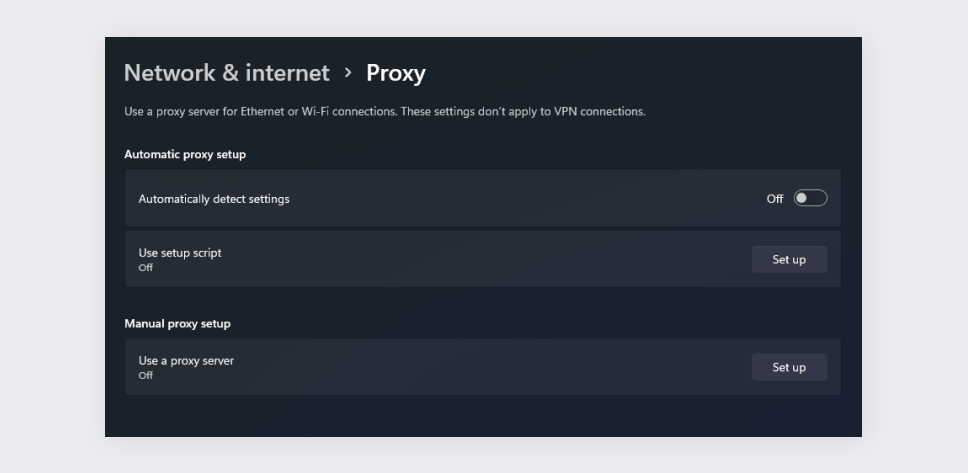
Using an automatic proxy server that your work or school installed on your Windows computer? Then toggle the Automatically detect settings option to On.
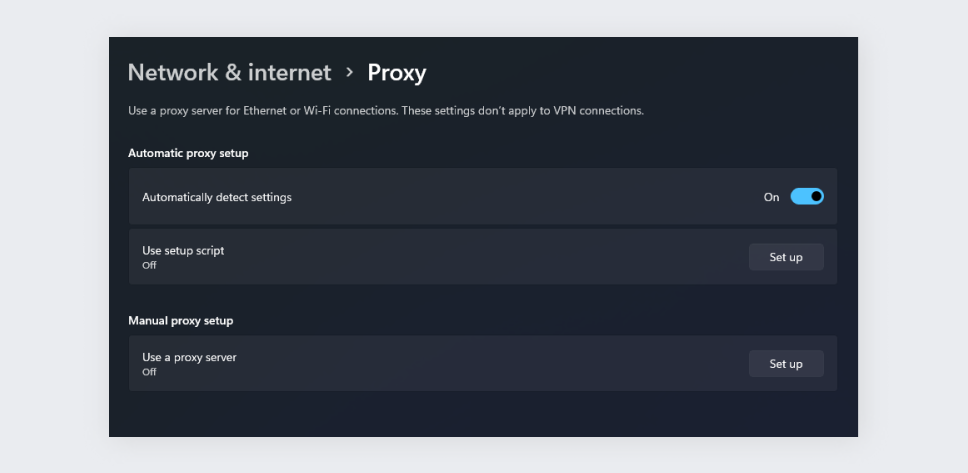
Method 2: Manual setup
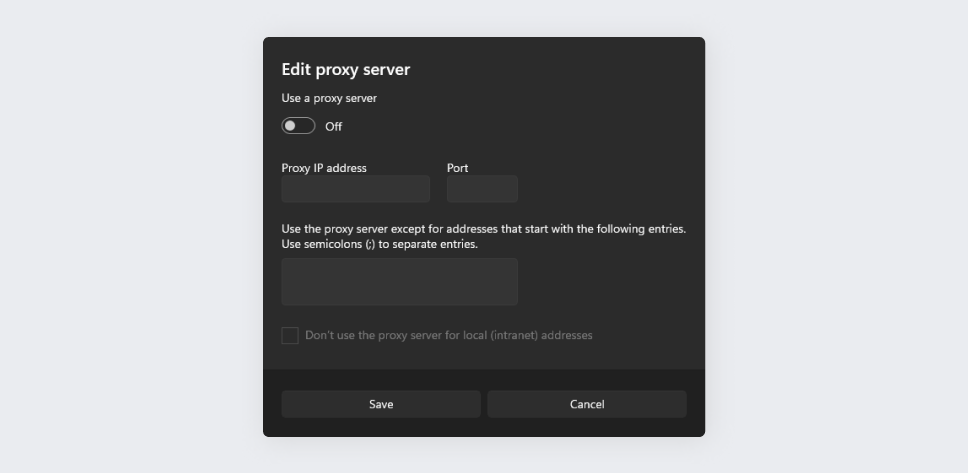
Need to set up the proxy manually? Choose Set up at Manual proxy setup. Toggle Use a proxy server and enter the proxy IP and port when asked.
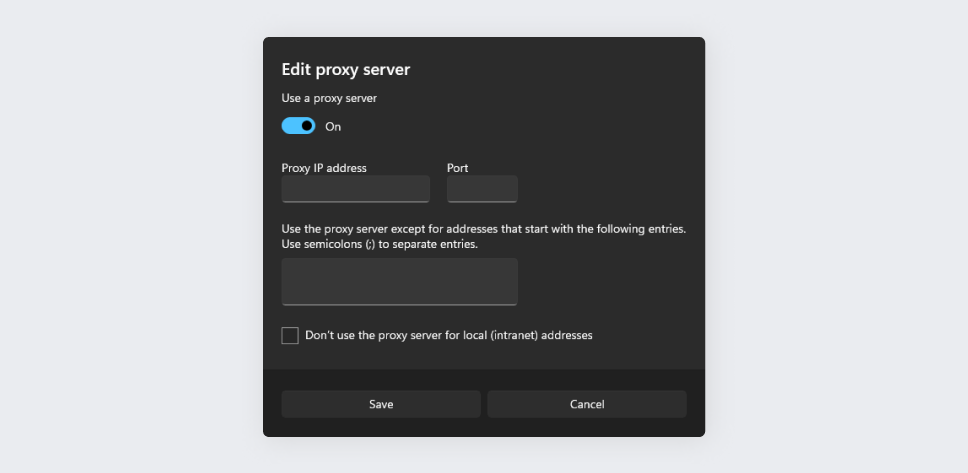
Click Save, and you’re done.
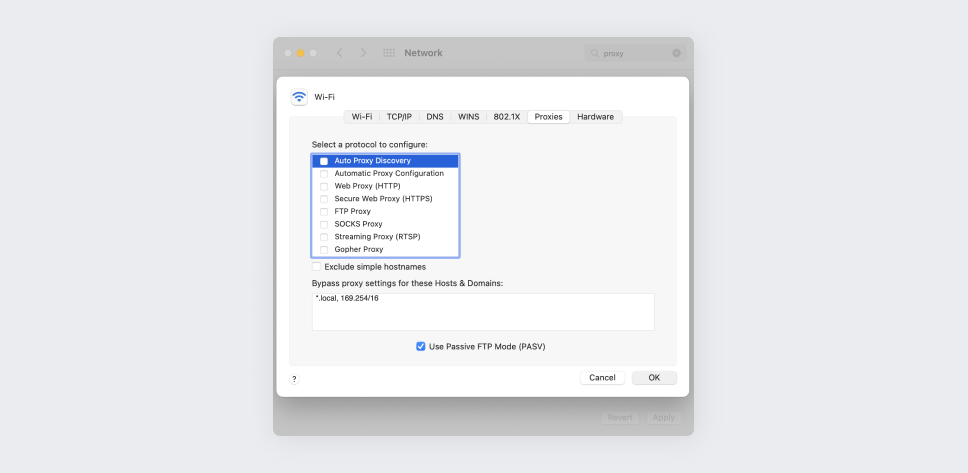
Mac
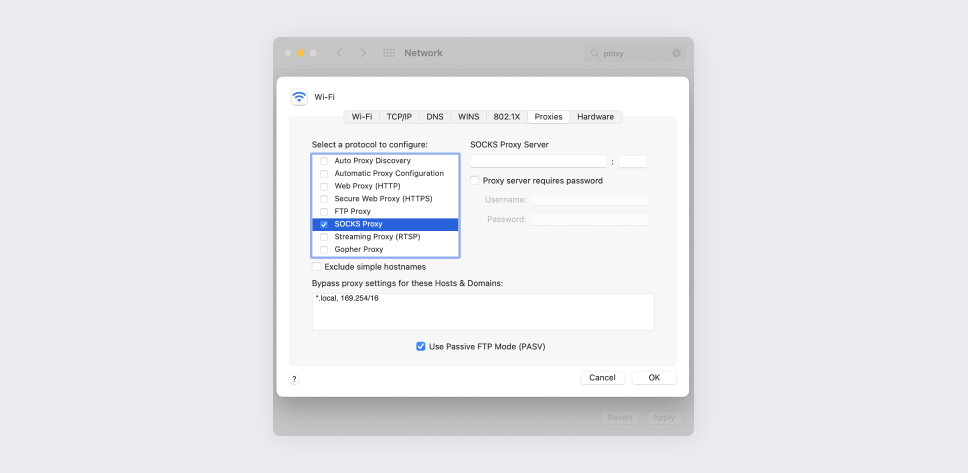
Step 1: Under Select a protocol to configure, choose the protocol of your proxy and check the box next to it.
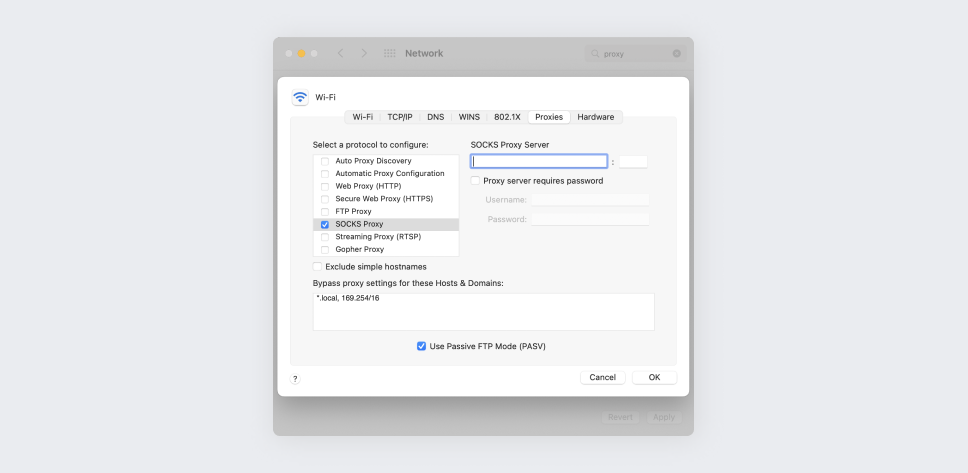
Step 2: Input the server IP or hostname in the server box, the port in the port box, and your credentials if needed.
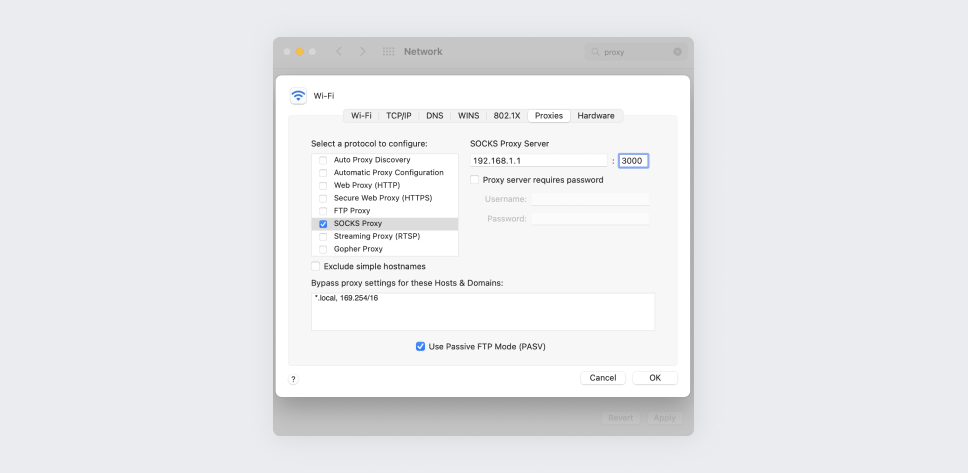
Step 3: Press OK, and you’re done.
Linux
Step 1: Under Network proxy, choose Automatic if your proxy is already installed on your system or Manual if you need to do it yourself.
Step 2: Find your proxy’s protocol in the list provided.
Step 3: Input the server IP or hostname and port.
Step 4: Exit the box, and you’re done.
How to disable proxy in Chrome
Disabling proxy settings in Chrome is even easier than setting them up. Follow these three steps no matter what operating system you have, then follow the guide for your OS.
Step 1: Click on the menu button in Chrome, and select Settings.
Step 2: Enter “proxy” in the Search settings field.
Step 3: Choose Open your computer’s proxy settings button and click on it to open your system proxy settings.
Windows
Step 4: slide the Automatically detect settings option to Off.
Step 5: Click on Set up button on the Use a proxy server line and toggle the Use a proxy server option to Off.
Mac
Step 4: Enter the Proxies tab
Step 5: Uncheck every protocol under Select a protocol to configure.
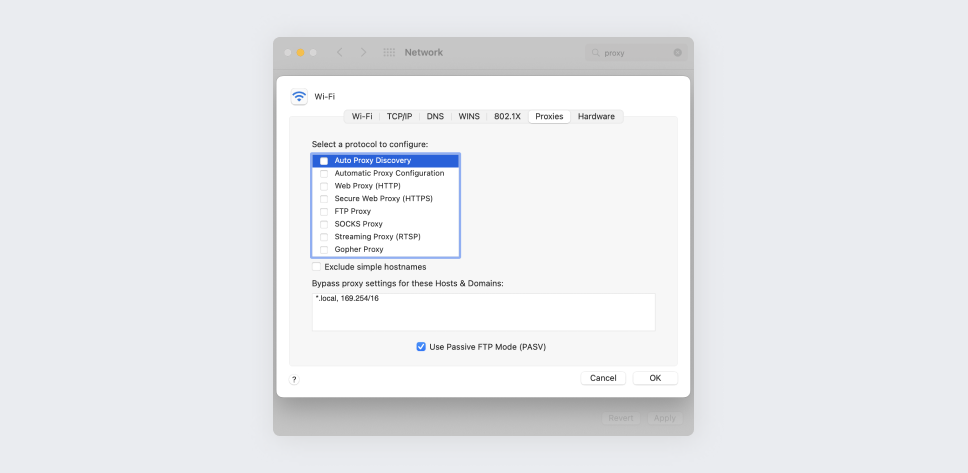
Step 6: Click OK.
What should proxy settings be for Google Chrome?
Google Chrome doesn’t have its own proxy settings – it uses those of the device. As such, there are no recommended or obligatory proxy settings for Google Chrome. This means that whichever proxy settings you set, those are the settings Google Chrome “should have.”
By default, operating systems come with blank proxy settings. To check them via Chrome, follow the steps outlined in the How to change proxy settings in Chrome part of this article. If you find that your device is unexpectedly using a proxy, disable it and check for viruses.
What is better, a proxy or a VPN?
A VPN (Virtual Private Network) is better than a proxy 9 times out of 10, and I’m not just saying that because a VPN company is paying my wages.
Let’s compare their benefits:
Proxy | VPN |
|---|---|
Doesn’t require installing an app | Routes your data via a VPN to bypass network firewall and region blocks; |
Routes your data via a proxy server to bypass network firewalls and region blocks | Encrypts your data so that your ISP (Internet Service Provider) or network administrator wouldn’t know what you’re browsing for |
VPN apps allow for easy switching of server location | |
Doesn’t require fiddling with system settings | |
Have many other convenient settings |
So outside of not requiring you to have administrator rights to install apps, a proxy is inferior to a VPN in all ways. To learn more, read our VPN vs. proxy article.
A proxy you don’t need to set up
Changing Google Chrome proxy settings isn’t the hardest thing in the world, but it can still get quite annoying. If your school or job provides you with a proxy server, unfortunately, you will need to set it up manually. But if you just need a proxy for privacy or to save bandwidth, there are easier alternatives. May I recommend a proxy you can control with a few clicks? That’s Surfshark’s browser extension for Google Chrome.
FAQ
Does Google Chrome have its own proxy settings?
No, Google Chrome uses the proxy settings set on your device.
How do I manually set proxy settings in Google Chrome?
To manually set the proxy settings, open Settings in Chrome, type in “proxy” in the search field, and click the Open your computer’s proxy settings button.
Should proxy settings be on or off?
It depends on whether you set up a proxy or not. If you have set up a proxy, then it should be on. If you haven’t intended to use a proxy, they should be off.